Sew Karen-ly Created...

If you have arrived here via a link (such as to a tutorial) click on "Sew Karen-ly Created" to return to the latest blog post. I invite you to my website to see a gallery of quilts and patterns available for purchase.
Comments are always appreciated, simply click the word "comments" at the end of each post to leave your message. Thanks for stopping by!
Showing posts with label String Quilt. Show all posts

Tuesday, 1 February 2022

Christmas String Progress

This past snowy weekend was incredibly productive for sewing, and I am so pleased with the progress made in my Christmas scraps box. My 40 blocks are all sewn, trimmed, papers removed, and edge-stitched.  Whew!
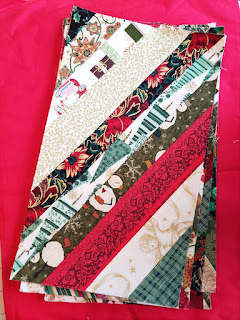
As mentioned in the previous post, I dug out a box of scraps to make string blocks during our weekend snow storm.  I had 6 made which were samples from a workshop I taught (back in the day when such things were possible), and most of the foundation papers and strips were cut, so it was all straight sewing.

The papers were removed while watching a movie;  I take a large recycling bag and work inside it as I rip so that the mess is contained.  Since the blocks had no seam intersections, the papers tore right off.  
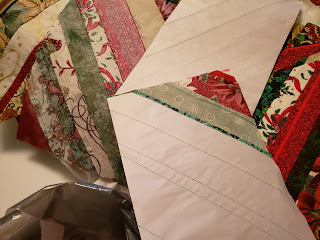
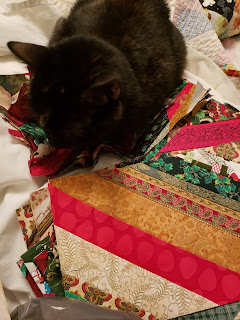
Polly was a big help holding the finished blocks.

As soon as the papers were removed, I ran with the blocks to the machine to do the edge-stitching.  This step is SO important with string blocks, as the ends of the seams can open while removing the paper, and with handling.  Stitching 1/8" from all edges within the seam allowance with a short stitch length holds everything in place.  
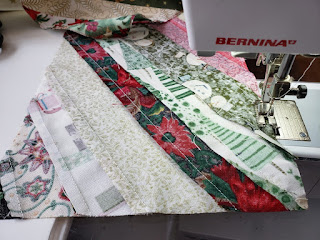
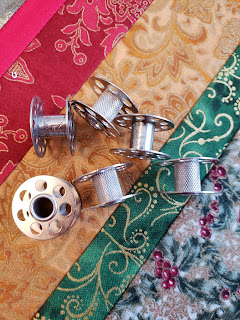
A bonus when sewing multi-coloured scraps is being able to use up the thread on near-empty bobbins. I emptied 6 on the weekend!! 
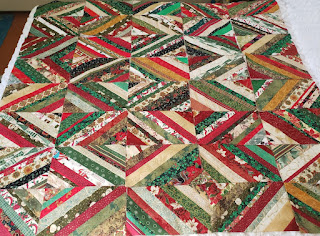
Here are the blocks laid out on a queen sized bed. At the moment, the quilt top measures 52" x 57-1/2".  Originally, I had thought to make this couch-sized, but it's really not much of a stretch from here to keep going and finish it a usable bed size.  To do this will either involve borders or sashing, and I am rather leaning towards the latter.  My plan is to take some time to sketch it out on the computer in EQ8 and see my options.

So, this one will get set aside for a little bit while I do that.  In meantime, I am thread-painting a tree, and getting ready for February's Colour Builder block.  The threads are already on the way and I can't wait for them to arrive.  There was also notice of a shipment of fabric coming from Island Batik, which will be used in a magazine project. Lots to keep me distracted this week.  The weatherman is predicting some snowy weather for next weekend, so perhaps the string quilt will get hauled out again...

Tuesday, 19 March 2019

Wild Strings Quilt Tutorial

As an Island Batik Ambassador, all products in this post were given to me by Island Batik, Aurifil thread and Hobbs Batting.
The Island Batik Ambassador challenge for March is "Vintage Re-imagined."
We are free to interpret the topic any way we choose, and it's always so interesting to see how different 50 Ambassador imaginations work. Our guidelines this month were

  • Vintage quilts inspiring new creations
  • 36” x 36” or larger
  • Any technique
When I think of vintage quilts, simple scrap patterns come to mind so of course it didn't take me long to consider doing one of my favourites, a string quilt. Here's one made in Missouri, around 1860. Most of the strips run horizontally in these blocks, with just one being vertical.  Do you suppose the maker planned that? It certainly adds interest to this quilt.
I thought of some of the ways I have pieced string blocks in the past, and looked to a way to modernize the look.  These were all graduation gifts for friends of my son, and all contained the same scraps.

This made for a quick baby quilt:

I've taught classes on string quilting, and encourage the recycling of old phone books, or any catalogues printed on thin paper, to use as the foundation. This cushion was pieced on left over tax forms from Revenue Canada. :)
You can find tutorials for a couple of string projects on this blog, showing how to stitch the fabric to the foundation paper:  Christmas placemats, a tote bag, and even an apron.  One of the cool things about strings is you can make your blocks any size or shape, including circles...
60 degree diamonds...

or rectangles.

60 degree diamonds always intrigue me, as you can set them together so many ways to make really cool patterns, but rectangles are of course way easier to sew together, with no Y seams.  If there was just a way to combine the two. Hmmm... I dug out some large sheets of newsprint and started playing with paper, pencil and the 60 degree line on my ruler. (These large newsprint pads are available at art supply shops. These came from The Art Shack in Moncton, New Brunswick.)
I found that a rectangle 6-1/2" x 10-1/2" divided diagonally corner-to-corner gave me a 60 degree line through the centre. Perfect! 8 across and 6 down would make a lap sized quilt. I cut 48 pieces 6-1/2" x 10-1/2" and drew my diagonal lines in one direction on half of the sheets and running in the opposite direction on the other half. 
Now to decide on colours.  "Vintage" always makes me think cream and black so I went hunting through my Island Batik stash.  I had some plain black which I wanted to use for my centre strips, and discovered a rather unconventional strip set, a partial layer cake, and some yardage to match.  Sewing one test block, I was hooked on the look.  The main fabric line is called "Wild Things", with a few leftover 10" squares of "Jungle".

I started by cutting the solid black into 2" strips, and centred them on the diagonal lines. The colours were cut in varying widths, from 1/2" to 2-1/2" and split into lights and darks.  I pieced one side in each, separated by the centre black.

For the outer row, I used solid black to do one side, so that the diamonds running vertically were complete.
I added a 2" border to the top and bottom in solid black, and a 6" border all around of the coordinating print.  Isn't this gorgeous?!?

Because the quilting would not show, stitching in the ditch of each strip was all that was needed.  The border was quilted in concentric wavy lines, and bound in black.  Aurifil thread was used for both piecing and quilting.
Hobbs Tuscany silk  batting was used in the centre. 

Finished quilt is 56" x 72" .  To me, this quilt has a masculine, modern vibe.  I really like it.

Because of the fabric line used, the quilt is named "Wild Strings".
It is pictured here with the resident wild cat, Polly.  Look at those claws!!!

Thank you to Island Batik, Hobbs batting, and Aurifil thread.  You can find the complete list of 2019 Ambassadors here;  please visit each to see how the Vintage Re-imagined Challenge has been met!

Wednesday, 20 July 2016

String Workshop Sample X

I have been working steadily on samples for two new fall workshops. Earlier, I showed you these blue and white string blocks in progress.  I decided 48 of these 8" blocks would be enough for a lap quilt.
Polly and I pondered how to set them together, and it suddenly struck us that using the same layout as for my son's Log Cabin "X" quilt would be perfect. String blocks are SO much less work than log cabins, with no seam matching or need to keep the block true; the foundation paper does that for you.
When I opened the folder of pictures of the log cabin quilt, I had a smile over how much Polly has grown since we made that first X quilt.  She looks so scrawny!
Here's the log cabin version:
 Here are the string blocks in the same layout (although the quilt is turned sideways in the photo).
This is the string quilt on top of the log cabin.  The blocks for the latter were 12" instead of 8". 
I think this is a great way to show off the power of the lowly string block;  it imitates a log cabin nicely, and works beautifully in traditional settings such as barn raising, or straight furrows. There are a couple of spots left in this Beginner String Quilt Workshop to be held Wednesday October 12 during the Nova Scotia Fibre Arts Festival. Just email if you would like a spot saved.
Although I am not big on plain borders, I may add one to this lap quilt, just to flesh it out a bit. It will be feather quilted, as per the original.

Wednesday, 8 June 2016

A Taxing Surprise

We've had a rainy few days, which has been a much needed break from gardening. I took advantage of the weather to sew string blocks for the beginner workshop I will be presenting during this year's Fibre Arts Festival. 
I've mentioned before that I often use pages from old telephone books as foundations, as they are thin and tear away easily after piecing...(plus they please my frugal heart!)  However, in today's online world, telephone books are becoming smaller, and scarcer.  I've been canvassing my neighbours -unsuccessfully to date- for old Aliant books to make sure there are enough on hand for the fall workshop. (Someone must have a stash somewhere...?)
Imagine my delight when my very resourceful hubby plopped these down on my cutting table:
The tax forms from Revenue Canada are printed on newsprint!  I tore into them right away to see how they performed.
 (I even learned a thing or two as I worked!)
The pages came away very cleanly and easily after stitching.  The newsprint is actually a bit thicker than the phone book, and felt more stable when sewing.
There are 26 usable pages in the Forms booklet (the T1 itself is too thick to use, but the Schedules are great), and 40 pages in the General Income Tax and Benefit Guide.  Using both books, you have enough foundations for 66, 8" blocks, yielding a quilt 56" x 72". Who knew there was a good side to taxation?
We have 32 blue and white blocks completed so far, and Polly is anxious to do more.  
I hate to think I am now looking forward to when tax time rolls around again next year!!

Sunday, 15 May 2016

String Tote

 
Instead of being home quilting this month, I have donned another hat which, for the most part, keeps me AFK (away from keyboard)...and AFSM (away from sewing machine!). I've been given the opportunity to act as photographer on a project that involves travelling around our province, visiting somewhat remote areas that I feel privileged to see...off-road spots accessible sometimes only in a big 4 x 4 "dualy" truck. My rubber boots are getting lots of miles on them.
Since sewing time is sporadic and interrupted, it's a perfect time for working on string blocks. I had leftover strips of blue and green Hoffman 1895 watercolours in various widths lying around, so I put them to good use in this quick tote bag. Instead of thin paper for the foundation, I used a heavy weight canvas which gives good body to the bag. There was just enough of a coordinating floral blue/green batik in my stash for the lining.
A machine triple stitch gives a nice, professional looking finish along the edges of the strap, and is both functional and decorative. Using 40 weight Aurifil thread through the needle gives the stitch a bit more "umph"; it resembles the stitching on a man's belt. On my Bernina 440, this built-in triple stitch is # 157.
To make the tote, I used the measurements previously shared here on my blog, adding an inside pocket made from a leftover block.  The bag will be a sample for my String Quilting workshop in October...cos what's a workshop without a trunk show of inspiration!
Polly was on the job to help me photograph the bag this morning.  She loves to climb!

My fall workshops are filling up quickly, so please email if you would like your name added to the list for this beginner workshop.