|
| As an Island Batik Ambassador, all products in this post were given to me by Island Batik, Aurifil thread and Hobbs Batting. |
The Island Batik Ambassador challenge for March is "Vintage Re-imagined."
We are free to interpret the topic any way we choose, and it's always so interesting to see how different 50 Ambassador imaginations work. Our guidelines this month were
Vintage quilts inspiring new creations
36” x 36” or larger
Any technique
When I think of vintage quilts, simple scrap patterns come to mind so of course it didn't take me long to consider doing one of my favourites, a string quilt. Here's one made in Missouri, around 1860. Most of the strips run horizontally in these blocks, with just one being vertical. Do you suppose the maker planned that? It certainly adds interest to this quilt.
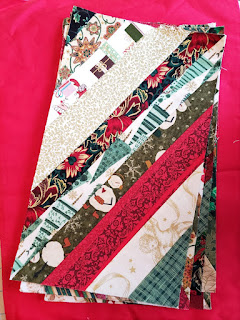
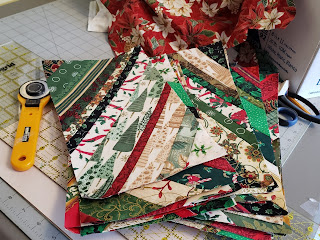
I thought of some of the ways I have pieced string blocks in the past, and looked to a way to modernize the look. These were all graduation gifts for friends of my son, and all contained the same scraps.
This made for a quick baby quilt:

I've taught classes on string quilting, and encourage the recycling of old phone books, or any catalogues printed on thin paper, to use as the foundation. This cushion was pieced on left over tax forms from Revenue Canada. :)
You can find tutorials for a couple of string projects on this blog, showing how to stitch the fabric to the foundation paper:
Christmas placemats,
a tote bag, and even
an apron. One of the cool things about strings is you can make your blocks any size or shape, including circles...
60 degree diamonds...
or rectangles.
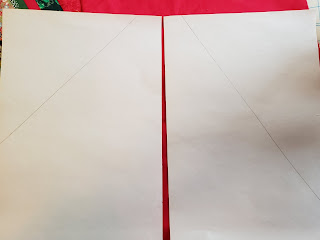
60 degree diamonds always intrigue me, as you can set them together so many ways to make really cool patterns, but rectangles are of course way easier to sew together, with no Y seams. If there was just a way to combine the two. Hmmm... I dug out some large sheets of newsprint and started playing with paper, pencil and the 60 degree line on my ruler. (These large newsprint pads are available at art supply shops. These came from
The Art Shack in Moncton, New Brunswick.)
I found that a rectangle 6-1/2" x 10-1/2" divided diagonally corner-to-corner gave me a 60 degree line through the centre. Perfect! 8 across and 6 down would make a lap sized quilt. I cut 48 pieces 6-1/2" x 10-1/2" and drew my diagonal lines in one direction on half of the sheets and running in the opposite direction on the other half.
Now to decide on colours. "Vintage" always makes me think cream and black so I went hunting through my Island Batik stash. I had some plain black which I wanted to use for my centre strips, and discovered a rather unconventional strip set, a partial layer cake, and some yardage to match. Sewing one test block, I was hooked on the look. The main fabric line is called "Wild Things", with a few leftover 10" squares of "Jungle".
I started by cutting the solid black into 2" strips, and centred them on the diagonal lines. The colours were cut in varying widths, from 1/2" to 2-1/2" and split into lights and darks. I pieced one side in each, separated by the centre black.
For the outer row, I used solid black to do one side, so that the diamonds running vertically were complete.
I added a 2" border to the top and bottom in solid black, and a 6" border all around of the coordinating print. Isn't this gorgeous?!?
Because the quilting would not show, stitching in the ditch of each strip was all that was needed. The border was quilted in concentric wavy lines, and bound in black. Aurifil thread was used for both piecing and quilting.
Hobbs Tuscany silk batting was used in the centre.
Finished quilt is 56" x 72" . To me, this quilt has a masculine, modern vibe. I really like it.
Because of the fabric line used, the quilt is named "Wild Strings".
It is pictured here with the resident wild cat, Polly. Look at those claws!!!
Thank you to
Island Batik,
Hobbs batting, and
Aurifil thread. You can find the complete list of 2019
Ambassadors here; please visit each to see how the Vintage Re-imagined Challenge has been met!