Sew Karen-ly Created...

If you have arrived here via a link (such as to a tutorial) click on "Sew Karen-ly Created" to return to the latest blog post. I invite you to my website to see a gallery of quilts and patterns available for purchase.
Comments are always appreciated, simply click the word "comments" at the end of each post to leave your message. Thanks for stopping by!

Thursday 3 February 2022

For Wee Bairn in Blue

 Last week, I showed you my newly released pattern called For The Wee Bairn.  It was made with a new collection called "Lace and Grace" from Island Batik.  I liked the quilt so much, I made it a second time, this one using a blue background and assorted scraps for the 9 patches.  The gorgeous snow this past weekend made a perfect backdrop for photography.

Other than using different fabrics, I followed my own directions exactly.
It's pretty amazing how quickly the blocks go together.
I quilt on my domestic sewing machine, so my quilts are pin basted.  This is the only part of the process I do not enjoy. :(
This time I chose a soft yellow flannel for the backing, and used Aurifil 40 weight thread both in top and bobbin.  As before, I stitched free hand feathers in the curved sections, and simply outlined the Improved Nine Patch blocks.

Since I have no wee bairns of my own to wrap, this version is for sale.  You can find it on my website.


Wednesday 2 February 2022

Valentine's Mug Mat


Here's a quick project to stitch for your special someone for Valentine's Day.  This mug mat is larger than most, as it's meant to be shared by two.  Fusible appliqué means you can whip this up in time for the big day.


Spiral Heart Mug Mat
Finished Size:  6-1/2" x 11"
Materials
8" square of white*
8" square of red*
7" x 11" background fabric
8" square of fusible web
8" square of tear away stabilizer
7" x 12" batting
7" x 12" backing
1, 2-1/4" x WOF strip of red for binding
* Quilter's Rose by Stof used in sample project.

You can get the pdf template for the heart for free here. Make sure when you print the heart you choose "actual size" from the list of print options (no scaling). Please note that the design is already reversed for you, ready for tracing onto the back of the fusible web.
Directions:

Trace heart design onto fusible web. Note that the heart has two sections.  Fuse one section to back of red and one to back of white fabrics.  Cut out carefully.  Remove paper backing and arrange the two heart sections so that they are snugged up with no gaps in between.  I use a corsage pin to gently nudge the pieces into place.  Fuse to centre of background fabric. 
With stabilizer underneath work stitch around edges of heart to secure.  Sample shown uses straight stitching, but a narrow zigzag would add nice definition to the edges.  Trim stabilizer.
Add batting and backing, pin baste.  Quilt.  Sample shown is quilted around the outside of heart and echoed 1/4" away.  Squiggly lines are free motion quilted from the heart to the sides. Trim mat.  Mine is 6-1/2" x 11.
Fold 2-1/4" binding strip in half lengthwise, wrong sides together and press. Sew to front of quilt, mitering corners.  Flip to back and hand stitch in place.  


This entire pattern is available in a printer-friendly format as a free download at this link: https://payhip.com/sewkaren

Tuesday 1 February 2022

Christmas String Progress

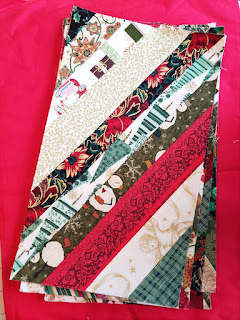
This past snowy weekend was incredibly productive for sewing, and I am so pleased with the progress made in my Christmas scraps box. My 40 blocks are all sewn, trimmed, papers removed, and edge-stitched.  Whew!

As mentioned in the previous post, I dug out a box of scraps to make string blocks during our weekend snow storm.  I had 6 made which were samples from a workshop I taught (back in the day when such things were possible), and most of the foundation papers and strips were cut, so it was all straight sewing.

The papers were removed while watching a movie;  I take a large recycling bag and work inside it as I rip so that the mess is contained.  Since the blocks had no seam intersections, the papers tore right off.  

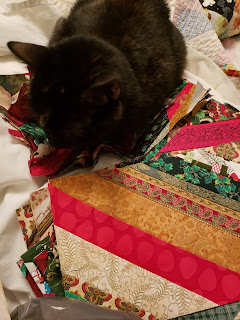
Polly was a big help holding the finished blocks.

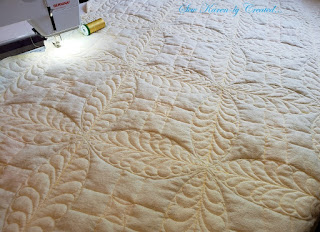
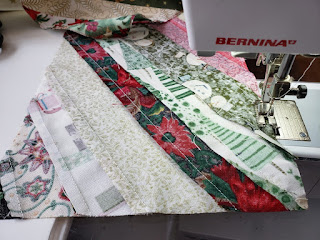
As soon as the papers were removed, I ran with the blocks to the machine to do the edge-stitching.  This step is SO important with string blocks, as the ends of the seams can open while removing the paper, and with handling.  Stitching 1/8" from all edges within the seam allowance with a short stitch length holds everything in place.  

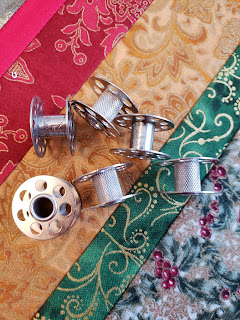
A bonus when sewing multi-coloured scraps is being able to use up the thread on near-empty bobbins. I emptied 6 on the weekend!! 
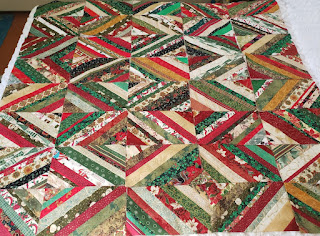
Here are the blocks laid out on a queen sized bed. At the moment, the quilt top measures 52" x 57-1/2".  Originally, I had thought to make this couch-sized, but it's really not much of a stretch from here to keep going and finish it a usable bed size.  To do this will either involve borders or sashing, and I am rather leaning towards the latter.  My plan is to take some time to sketch it out on the computer in EQ8 and see my options.

So, this one will get set aside for a little bit while I do that.  In meantime, I am thread-painting a tree, and getting ready for February's Colour Builder block.  The threads are already on the way and I can't wait for them to arrive.  There was also notice of a shipment of fabric coming from Island Batik, which will be used in a magazine project. Lots to keep me distracted this week.  The weatherman is predicting some snowy weather for next weekend, so perhaps the string quilt will get hauled out again...