 As a firm, no-nonsense believer in the seriousness of having fun, I do not think that everything we make as quilters needs to be an heirloom, nor cause us stress in our endless quest for perfection. Our projects do not need always to be eggstravagant or eggsotic…or leave us eggshausted, trying to get things finished on time. With Good Friday only three days away, I suddenly decided I wanted some colourful placemats to help eggspress my inner child at Easter. In the wink of an eye, these super quick and ineggspensive eggs can become an eggsquisite part of your Easter décor – as placemats, a centerpiece, or even as a hanging on your front door. The"ran out of time" eggscuse will not work here. Being such a good egg, I will share the process with you.
Overeasy Eggs
Finished Size: 12-1/2” x 16”
Materials Required:
Background (yellow) 14” x 17”
Strips of assorted widths of pink, mauve, blue and purple at least 13-1/2” long
Freezer paper 14” x 17”
Fusible Batting 14” x 17”
Backing 14” x 17”
Approximately 8” Paper backed fusible webbing (like Steam A Seam or Wonder Under)
Decorative embroidery threads
Sewing and quilting threads to match
1/4” seam allowance used throughout
Directions: An oval is not the easiest shape to draw and in the spirit of keeping this easy, look around your house for a shape to trace. I eggspect you will find a platter in your kitchen which will be an eggceptable shape. Trace around your platter on freezer paper.
 I decided my oval was not large enough, so I borrowed hubby’s compass and used a trick I learned from my woodworking assistant days. This is known as scribing a line with a set of points and is an easy way to install a set of kitchen cupboards…or enlarge an odd shape such as we have here. Basically, you put the point of the compass on the line you are duplicating, set your pencil the desired distance from it, and follow the point along your original drawn line. I ended up with an oval measuring 13” x 16-1/2”. Yours does not have to be cut to this eggsact size. Immediately take the compass back to the basement and put it in the eggsact spot you found it – otherwise, there will be shell to pay...
 Iron your freezer paper pattern to the wrong side of your background fabric; cut out with scissors.
 Gather your strips (assorted widths, 1” to 4”) and iron fusible paper-backed web to the wrong side of the strips. This is the spot where I ran into trouble, having cleaned out my large supply of scraps only a few weeks ago. The yolk was on me when I went to find Easter pastels...
 If you have decorative edge blades for your rotary cutter, this is a great time to try them out. I used both the Wave, and the Scallop and Peak.
  If you don't have such blades, pink the edges of your strips using pinking shears or cut a free hand curved edge with your scissors. If the thought of that eggsassperates you, cut straight strips and sew rickrack along the edge. The quilt police are not watching; as you read further along in this post you'll see how I know they are not at your house today.
Fuse strips in place on your background. Remove freezer paper from the back of your egg. The freezer paper shape may be re-used for additional placemats. Iron fusible fleece to the wrong side of your egg. Trim off any eggstra around the edges. If you are not using fusible batting, pin baste regular batting underneath your project. The batting is added at this point to act as a stabilizer for the stitching you are about to add. This saves the additional work (and eggsspence) of tear-away stabilizer.
 This is the really fun part. Choose some pretty decorative threads and select some built-in stitches on your machine. I chose designs with flowers and leaves. Eggsperiment with stitches you've never used before. I stitched along the edges of the strips as well as down the middle.
 The guide bar comes in handy to keep your rows of stitching eggsactly straight.
 Layer stitched top on the backing, right sides together. Note that this project is “birthed” rather than bound. I do not cut the backing to fit at this point, but leave it as is to be trimmed after stitching. Stitch around outside edge, leaving a 6" opening for turning. Here's a little tip to make the turning process a little neater on the opening edge: when you begin stitching this seam, sew from the outside edge in 1/4" then turn to sew the seam. At the end of your stitching, stop, turn your work, and sew to the edge of the piece. This will make the edges on the opening turn in more easily. This shows the end of the seam:
 Here you can see the beginning and the end, both stitched off the edge of the seam allowance.
 Trim backing fabric on your egg to shape. Turn to right side through opening. Use a blunt instrument to run along the inside seam line to make it lie flat, such as a letter opener or a chopstick. Press well from the front. Pin open edges together and close with hand stitches.
  Pin baste your egg and quilt as desired. I used a serpentine stitch and the walking foot to quilt wavy lines across the egg.
 This is the really fun part. Choose some pretty decorative threads and select some built-in stitches on your machine. I chose designs with flowers and leaves. Eggsperiment with stitches you've never used before. I stitched along the edges of the strips as well as down the middle.
 The guide bar comes in handy to keep your rows of stitching eggsactly straight.
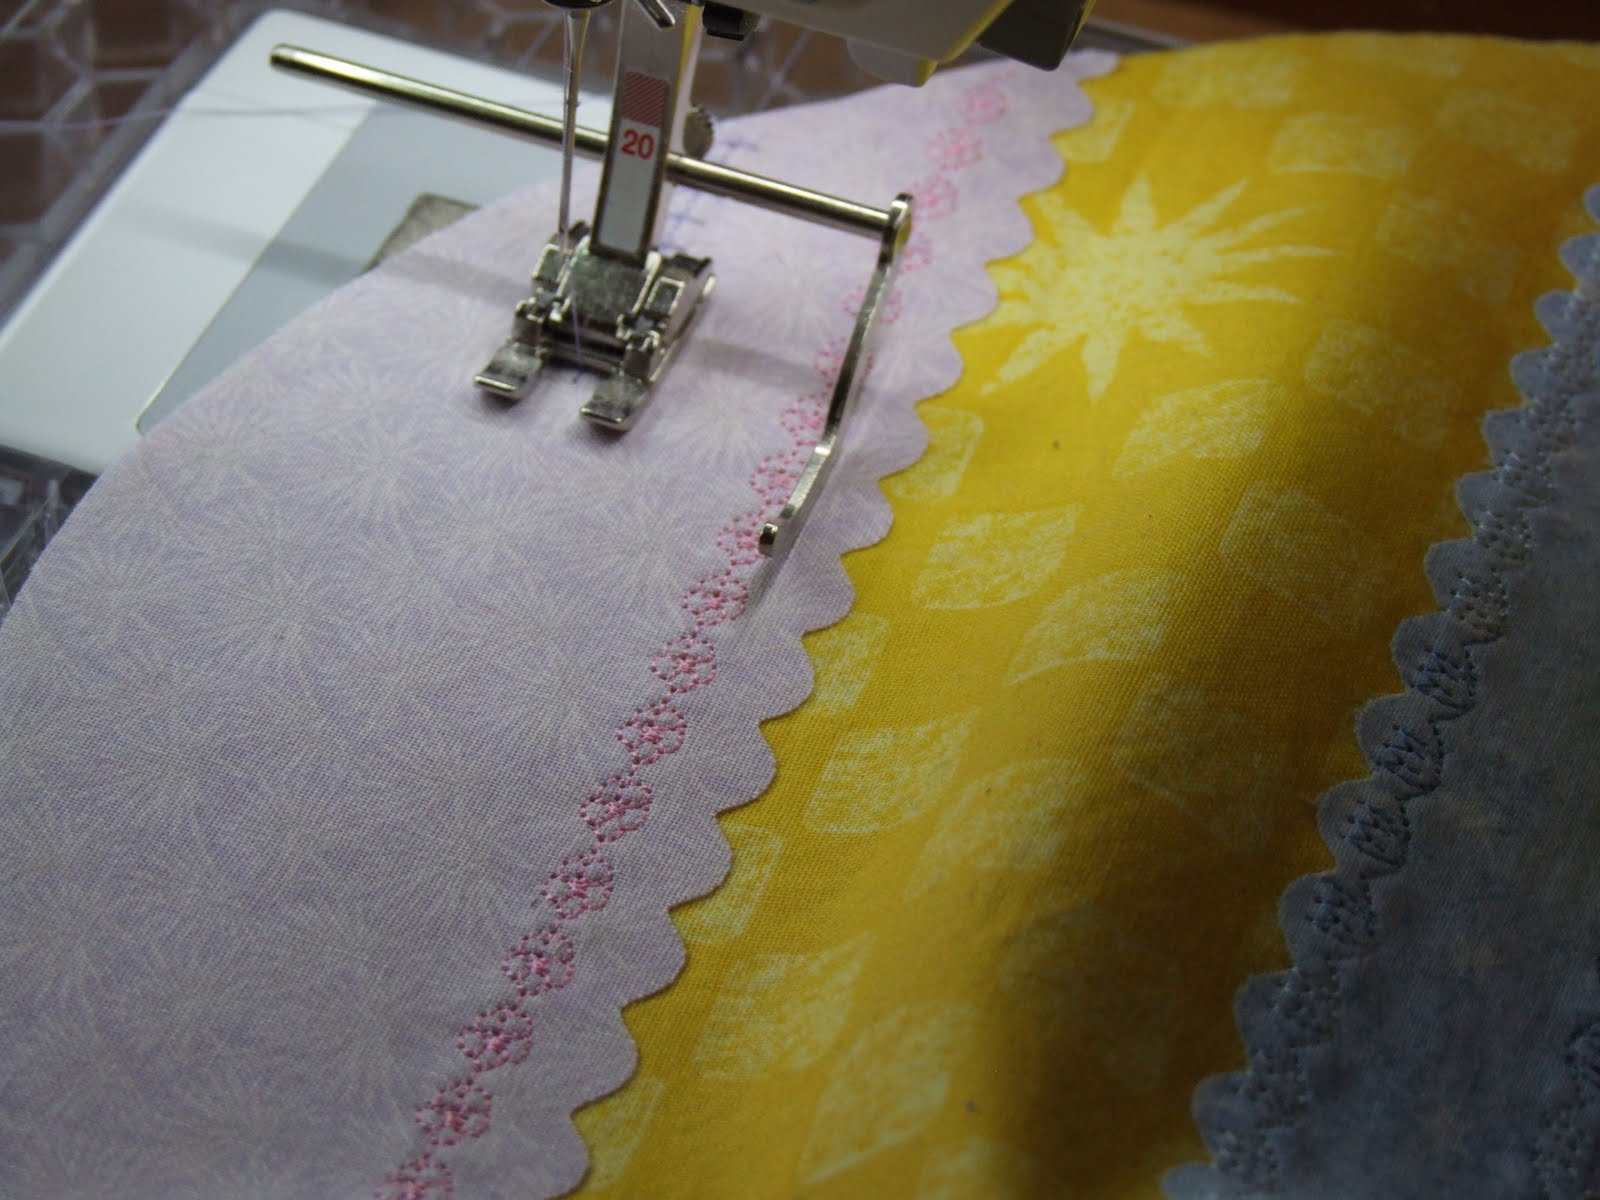 Layer stitched top on the backing, right sides together. Note that this project is “birthed” rather than bound. I do not cut the backing to fit at this point, but leave it as is to be trimmed after stitching. Stitch around outside edge, leaving a 6" opening for turning. Here's a little tip to make the turning process a little neater on the opening edge: when you begin stitching this seam, sew from the outside edge in 1/4" then turn to sew the seam. At the end of your stitching, stop, turn your work, and sew to the edge of the piece. This will make the edges on the opening turn in more easily. This shows the end of the seam:
 Here you can see the beginning and the end, both stitched off the edge of the seam allowance.
 Trim backing fabric on your egg to shape. Turn to right side through opening. Use a blunt instrument to run along the inside seam line to make it lie flat, such as a letter opener or a chopstick. Press well from the front. Pin open edges together and close with hand stitches.
  Pin baste your egg and quilt as desired. I used a serpentine stitch and the walking foot to quilt wavy lines across the egg.
 If your egg will be used as a placemat, you can eggshale - you're done. If you are going to hang it on a wall or door, embellishments such as buttons or yo-yo's as in the eggsample below may be added.
 Need a quick hanger for the back of your project and no time to sew a sleeve? A large safety pin is an easy solution to hang on a nail (that's how I know the quilt police are not at your house - their sirens are blaring outside mine :)
 This project, start to finish, took about an hour - no eggsaggeration. Isn't this eggsciting?
 This is my grandmother's egg cup, and the eggs were lovingly decorated by small hands many years ago. If you make some of these Over Easy Eggs, please send pictures to share with us. It's all part of the fun.


