Sew Karen-ly Created...

If you have arrived here via a link (such as to a tutorial) click on "Sew Karen-ly Created" to return to the latest blog post. I invite you to my website to see a gallery of quilts and patterns available for purchase.
Comments are always appreciated, simply click the word "comments" at the end of each post to leave your message. Thanks for stopping by!
Showing posts with label machine quilting. Show all posts

Monday, 6 April 2015

Quilting With A Twin

This post is not about working with my hubby (who is a twin) but about the use of a twin needle for quilting.
Like regular machine needles, twin needles are sold in various sizes and gauges but they have two number designations.  The sizing on this one - 2.0/80 - signifies it is a size 80 needle with 2 mm between the needles.You can buy sizes with the needles spaced further apart;  it all depends on the look you are going for.  Twin needles are most often used in decorative stitching, but there is also a use for them in quilting. I made this little satin bow tie quilt many years ago, on my old Kenmore, using a twin needle to stitch pintucks to recreate a tuxedo shirt front
I stitched the pintucks on the top layer of cotton only, for use in the patchwork.
I used a special pintuck foot on my machine but you don't have to have one;  any foot with a wide opening (like a satin stitch foot) will work.
 This is a 5 channel foot, and the grooves ride along the tuck to keep your rows straight.
I have used pintucks in several of my quilts, including one in this book by Leisure Arts called Quilts For Babies and Kids. 

This isn't a very good picture, but the shirt front of Thomas Mouse featured pintucks.
You can also use a twin needle with your walking foot to quilt evenly spaced parallel lines on your layered quilt. 
Depending on how far apart you want your rows of double lines, you can use the edge of your presser foot (or a bar guide) to space the rows.
 On the back of your work, the stitch looks like a narrow zigzag.
I am using a double needle and metallic thread on my Hoffman Challenge quilt to stitch rays from the centre section of the quilt. I like the effect. The downside of quilting with a twin needle is that you can't travel between sections very discreetly, so there is a lot of starting and stopping (and a whack of thread ends to darn in!).
The little zigzag stitch on the back doesn't look a bit out of place.

Tuesday, 17 March 2015

Playing With New Toys

I went to Mrs. Pugsley's Emporium on Friday to get some black fabric to make a backing and hanging sleeve for Rhythmic.  One of the requirements of the Paducah show is that odd-shaped quilts be mounted on a plain black backing to make it easier for the organizers to hang the quilts.  1.5 m of solid black isn't a very interesting purchase, so I looked around to see what was new in the shop. There were a lot of new notions in, and a pile of stencils caught my eye.  Isn't this sailboat sweet?  It's designed by Hari Walner, a woman whose books were a great help years back in my machine quilting. I decided it needed to come home with me...because you never know when you might need a sweet little design like this.
At the counter, I caught sight of a jar of what looked like dismembered digits...but upon closer inspection turned out to be rubber finger cots for use in machine quilting.  Ooowww, I'd better have some of those.  
These odd do-hickeys come in three sizes, small to large, so I chose 2 of each size.
While the blizzard raged outside, I decided to try out both the stencil and the finger cots.  I cut out a simple bib shape and layered it right sides together with backing and batting.
It will close with a piece of Velcro instead of ties, so I left the bottom open for turning.  Notice how when I start and stop sewing, I turn my work to run the stitching right off the edge.  Doing it this way makes the edges turn in much easier.
All the curved edges were clipped before turning.
Then the fun part.  I centred the stencil on the bib, and traced through the openings with a Frixxion marker.
Wearing those sticky finger cots, I followed the lines with free motion stitching using a YLI variegated blue thread. The rubber fingers gripped the fabric well and were not as cumbersome as gloves.  A breeze came up and knocked my stitching a little crooked on the sail (hey - I mentioned there was a blizzard outside, right?!) but it was a simple path to follow, and really cute.  
I can't wait to try this design out on a real quilt.

Thursday, 12 March 2015

Machine Quilting Tips

If you are looking for tips on how to make quilting on your home sewing machine a bit more doable, check out the spring issue of Quilter's Connection magazine.
Inside are tips from several quilters, including yours truly!

Saturday, 22 March 2014

Sweet and Simple

The first baby quilt is all done and will be delivered this afternoon.  I used the letters from the Quilt Of Learning pattern to spell out the recipient's name. The rest is simply plain squares of pastel pink, blue and white. When a name is so unique, I always think a personalized gift is extra special.
As I showed in the last post, I put a little scroll inside each heart - some curled to the left and some to the right.
I also stitched scrolls running up the length of the quilt in the strips framing the letters.
The letters themselves were free-motion outlined;  the background was stippled to make the letters stand out.
On the back is a soft blue and white check flannel.

Everything was from stash other than the pink for the binding which came from Mrs. Pugsley's. Emporium.  I chose pink as the quilt is for a little girl.
Now on to the next one, which will be made using brights.  It will have a very different "personality."

Tuesday, 2 July 2013

Finished Nine Patch Quilt

The decision got decided and the quilting got quilted.  In the end, I treated each of the three stripes in the border individually and carried the quilting motifs from the centre of the quilt out into the borders.
The blue stripes were sectioned off into squares using an air soluble marker to keep the lines true.  

 Inside each square, I did the continuous curve as in the  Nine Patch blocks.
In the white strip, a flexible ruler was used to mark a gentle curve running from one side to the other. This was all the marking I did, and it was merely to keep things symmetrical.  I find once you get the quilt under the machine needle, you loose sight of the big picture; it helps to have a line to keep you on track.
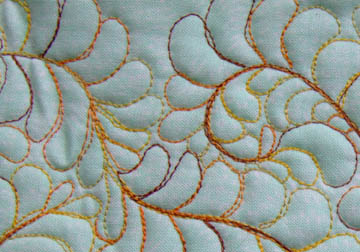
Using the purple spine as a guide, feathers were free-handed up this spine around the perimeter of the quilt.  This is one of the things we will be doing in the Beginning Feather Workshop during Fibre Arts Festival this October.  If you are interested in joining us, please email to get your name on the list.  The classes are filling quickly.
I'll show you the whole quilt as soon as I get some pretty pictures taken.  That won't be today however, as I am awaiting the arrival of a UPS truck delivering new fabric. Can't wait!

Sunday, 30 June 2013

Philosophy Of Machine Quilting

I don't profess to be an expert machine quilter; I am merely one who is comfortable with what she is doing.  I enjoy both the process and the result.  Because it is unmarked, my stitching is not always even and frankly, I like it that way.  To my eye, it gives a charming look, one which signals that the stitching is not computerised but that each has been done individually.  Sewing continuous curves in a square block is particularly satisfying, both in terms of speed and effect.  I've chosen to quilt the Nine Patch blocks this way.
In conversation when folks ask if I quilt by hand or machine, I often say I 'hand quilt by machine'.  I've heard long-armers say "your eye corrects the imperfections in your lines" but I don't think that's right at all...I think your eye IGNORES the lines, and focuses instead on the "poufs".  What do you zoom in on when you look at these squares?  To me it is the pattern created by the gentle puff in each block.
Here's where I am so far:  the main part is all quilted - continuous curves and feathered wreaths - and now it's time to decide how to do the border.
I was hoping for divine inspiration to strike but it hasn't and I'm a bit stumped as to whether to treat each of the three stripes in the border individually, or as one.  I am leaning towards one big feather up the entire width of the border

Friday, 24 May 2013

NS Fibre Arts Festival 2013

Yay - the schedule for the 6th annual Nova Scotia Fibrearts Festival is up on the website! Check it out to see the listing of workshops and events planned for this spectacular week in October.
This year I will be teaching one day workshops on beginner feather quilting.  If this is something you've been longing to try but need a little boost in the bravery department, then come join me for a day of instruction and encouragement in the fine art of feather quilting.

Feathers look impressive on a quilt, but really are not difficult to stitch.  We will draw feathers first with a pencil and then with the needle of our sewing machines.  To get started, we may mark a feather or two but mostly they will be stitched free hand without marking.   It is after all, just one basic teardrop shape...
...repeated and repeated for one glorious result!
We will stitch them in a line, 
We will stitch them up a spine,
We will stitch them in a box,
(We will not stitch them with a fox! Sorry...couldn't resist *-)  
We will stitch them in circles...
...and as an overall background pattern.  You will be amazed at what you can do!
Prerequisite for the workshop is some experience and comfort with free motion quilting.  Although this is a beginning feathers class, it is not a beginner free motion class so you should have the basic skills tucked under your belt.  If you have taken my Free Motion Quilting For The Absolutely Terrified workshop then you are good to go.  If you have not taken that class but would like to, I am planning to offer it again in small groups over the summer/early fall (dates and details to follow. Please email if you have a preference for dates and perhaps we can accommodate you)

Cost for Beginning Feathers is $65.00 tax included ($56.52 + $8.48 HST)  This one day workshop will be offered TWICE during the 2013 Nova Scotia Fibre Arts Festival: Friday Oct 18th and Sat. Oct. 19th. from 9 am -3 pm If you would like to register for this class, please email and I will add your name to the list. 
If free motion feathers are not your thing, there is lots more to choose from at this year's Festival, so make sure you click 2013 Schedule at the top of this page to see all of the offerings!