
Facing a quilt is way less terrifying than the ominous-sounding "facing the music" (a phrase, which frankly, I've never understood. If I paid for concert tickets, I would not be very happy to NOT be facing the music! :)) Adding a facing is similar to a binding, except unlike a binding, it does not show. It flips out of sight to the back of the quilt. It's a nice finishing technique to use when you want a clean, crisp edge on your quilt. I used it on this "Tempus Fugit" quilt featured in my book "Quilting Beauties" as I felt a binding would add a distracting edge.
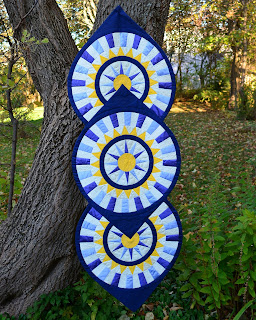 A facing is particularly nice on a modern quilt, adding to the minimalist look. I usually cut my facing strips 2 - 2-1/4" wide (sometimes narrower, depending on the project. Tempus Fugit above was pieced from silk, and I used a 1" wide facing, cut on the bias to hug the curves.) For my current project in cotton, I cut the strips 2-1/4" wide across the straight of grain. The strips are sewn to the sides of your quilt first, and they are cut the length of the quilt measured through the middle. 1/4" is pressed to the wrong side along one long edge of the strip, and the other edge is stitched to the front of the quilt.
 The facing is flipped out and gently nudged into place with an iron. Hard to tell from the picture, but I do not touch the iron to my quilt, but rather just have it hover above the seam for some gentle heat to encourage the facing to lay flat.
 The real trick is the understitching, which is done through the facing and the seam allowance, about an 1/8 of an inch away from the seam. If you are a garment sewer, you will know this technique from collars and arm hole facings. After the understitching is added, the facing turns easily to the back.


 The top and bottom facings fold in on top of the side facings, with the raw end tucked neatly inside.
 It gives a clean, uncluttered finish to the front of the quilt.
 Some folks sew a mitered corner through their facings before turning them to the back, but the advantage of sewing them square like this, is that you can slide a skinny rod through the opening at the end of the facing and not have to add a separate hanging sleeve. That means, less work, less bulk.
Have you ever faced a quilt?


The understitching will show on the back of your quilt, so it's important to match your thread colour. It is sewn in place with hand stitches along the length before the top and bottom facings are added.

The top and bottom facings are cut about an inch or so longer than the width of the quilt. This allows a little turn in for the raw end. It is stitched on as for the side facings.


Have you ever faced a quilt?


No I haven't faced a quilt, but the understitching, I did that all the time when sewing garments in cotton, sometimes I do it with the stretchy merino as well now. Love the " Tempus Fugit" super fabrics.
ReplyDeleteNot yet - although having made garments since I was about 18 umpty-ump years ago, I have faced many!
ReplyDeleteNo, I have not (yet) faced a quilt, but have done countless facings on garments. You are correct, understitching is key to get it to lie flat. Careful attention to pressing is also important, as you know. Great tut, thanks!
ReplyDeleteI never have, and to be quite honest, I didn’t quite understand how to do it. But with your wonderful tutelage, I’ll bet I can do it now! Tempus Fugit is a stunner! Silk, you say? No wonder it is so striking!
ReplyDelete