Sew Karen-ly Created...

If you have arrived here via a link (such as to a tutorial) click on "Sew Karen-ly Created" to return to the latest blog post. I invite you to my website to see a gallery of quilts and patterns available for purchase.
Comments are always appreciated, simply click the word "comments" at the end of each post to leave your message. Thanks for stopping by!

Thursday, 31 December 2015

A Little Fishy Fun

I made several fun gifts this Christmas, but my absolute favourite was this fellow, for my eldest son. He plays in a band called Moon Trout  and as you can see from the glittery,crescent shaped marking on this guy's face, he is indeed a moon trout.
I used the same (easy) curved strip piecing technique that I've employed on several projects (such as The Stuffle, and In The Summer Time),embellished during the quilting stage with 12 weight Aurifil threads.  I love the effect.  It's a great way to make a landscape background too... if you're not into trout.
I will be teaching a workshop on this free-form curved strip-piecing here in Amherst next October; please email (karen at karenneary.ca) if you'd like a spot reserved for this fun class.  

Tuesday, 29 December 2015

Polly Loves Christmas

Polly has been very busy over the holidays.  First she took on overseeing all the decorating...
Then there was this bit of nonsense where she discovered if she hid under the couch cover, she became invisible...except for that tell-tail sign.
This went on for days; we still think it's hilarious.
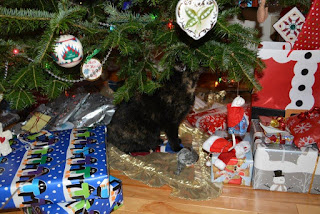
She claimed the tree as hers, and placed several of her toys underneath.
Gift bags were fair game;  if the top was open, she was in them, checking out the contents.
The boys got hexie bugs as gifts and Polly immediately took charge.  

She is as busy as a toddler on Christmas morning!

Thursday, 17 December 2015

Clare & Argyle

I am delighted that the latest issue of Quilter's Connection magazine is out;  it contains a quilt I designed and made using Hoffman Me+You Indah Solid Batiks, and stitched with gorgeous Aurifil Thread.

The Indah Solids are a new line of batiks from Hoffman, and they are fabulous to work with.  They take an iron exceptionally well; the seams set neat and flat with little effort (and no starch at all). I love a fabric you don't have to fight to have it lay flat!  Even on an angled cut, this fabric sewed with no distortion. 
Since the quilt was for a winter issue, I chose cool blues and greens - Cobalt,Arctic Blue, Leaf , and Pistachio. The background is a greyish/white, aptly named zinc.

Once the diamonds were pieced, I added a line of stitching with my walking foot during the quilting stage which forms the traditional "argyle" pattern, but in a very easy way.  To do this, I used 12 weight Aurifil thread in colours to match the fabrics.  A size 16 topstitch needle made stitching through the quilt layers very easy.

After this stitching was added, I switched back to 50 weight Aurifil to quilt some lines inside the light diamonds. All of the quilting on Clare & Argyle was done using a walking foot.
It was summer as I stitched this quilt, and I needed a spot to photograph it that didn't have flowers.  Beth Munroe, from Mrs. Pugsley's Emporium, kindly offered me free reign of her property.  This section of fence, with the weathered pickets on one end, was the perfect spot.
The pattern is a generous twin size, and in these colours is great for a boy's bed.
The magazine is available for purchase at Mrs Pugsley's Emporium where the quilt is also on display.
Mrs Pugsley's also carries the Indah Solid batiks, and has some pretty colours in stock:  Melon; Violet; Cadmium Orange; Pine; Burnt Sienna; Sweet Pea and the gorgeous background, Zinc..  Clare & Argyle could look like this:
I have the 12 weight Aurifil threads available for sale;  please email for a list of colours. I am happy to process mail-orders as well.

If you are wondering where the name for the quilt came from...Earlier this year, I presented a workshop on 60 degree diamonds in Saulnierville,N.S. which is located in the municipality of Clare.  With diamonds on my mind from that trip, the argyle design for the quilt emerged.  When trying to come up with a suitable name, I kept mulling "argyle...argyle...what goes with argyle..?"  If you are familiar with Nova Scotia geography, the answer is Clare.  A perfect tie-in! 
(I'll leave it to you to Google). 
Enjoy!

Tuesday, 8 December 2015

Katherine's Quilts

A year ago, I showed you my cousin Katherine's first quilt. When she finished that first one, she said she had cut out squares for four more quilts.  She now has three of these finished, in time for Christmas:
The green one is for Zeus, the blue one is for Patrick and the red one is for Alison. Great job, Katherine - you will be the favourite aunt this Christmas!

Sunday, 6 December 2015

First Big Snow

On Friday, we awoke to a winter wonderland.  Amherst had the distinction of receiving the most snow in the Maritimes for the day- 25 cm.  I am posting these pictures especially for Jennifer in New South Wales, who has recently returned from a trip to Canada but did not get to experience anything beyond a few flurries.  I had my fingers crossed that there would be a major snowfall just for Jennifer while she was here, but it didn't happen.  Jennifer, you'll have to make do with a few shots of our backyard...and Polly.
The snow was very wet and heavy, which made for hard shovelling.  With the accompanying wind, we also suffered quite a few broken branches


 The snow is so beautiful; I just love it.
 Our birch tree did not fare well at all.
It fell on top of the holly bushes, which - under the snow - are covered in red berries, which the birds enjoy.


 Across the street, the neighbour's tall spruce trees look like a Christmas card photo.

With Christmas lights now lit, the snow is certainly putting us in the holiday spirit.

Thursday, 3 December 2015

Joanne's Star of Beauty

I always know there is something gorgeous coming when I see a paperclip attached to Joanne Colleaux's email.  Have a look - wow!
Joanne's version of Star of Beauty could not look more different than mine, shown here.
The quilting is fabulous;  I particularly like the feathers quilted in the centre star.
From the back you can see her lovely stitching very clearly.


An award winning quilter, Joanne hails from Armstrong, B.C.; she has made many of my patterns. It is such a pleasure to see her work. Thank you SO MUCH Joanne for sharing these pictures.
The pattern for Star of Beauty is available in the current issue of AQS magazine,

Tuesday, 1 December 2015

Credit Card Wallet

December is here and if you're like me, you are looking for small, quick gift ideas.  This Credit Card Wallet is an easy (and useful!) choice.  I made it in 2 sizes.
The large wallet is the size of a chequebook;  it measures 3-1/2" x 7" and has slots for 12 cards.
 The smaller wallet has 8 card slots and measures 3-1/2" x 5".
Directions for the wallets follow, the only difference in the construction is the initial size of the cut pieces and the number of strips needed for card slots.
Materials Required:
For the large wallet:
2 pieces cotton print each 8" x 8" (main fabric)
6 pieces coordinating cotton print, each 4" x 8" (card slots)
2 pieces 8" x 8" heavy weight fusible interfacing*

For the small wallet:
2 pieces cotton print each 6" x 8" (main fabric)
4 pieces coordinating cotton print, each 4" x 8" (card slots)
2 pieces 6" x 8" heavy weight fusible interfacing*

For both:
1 covered elastic (hair elastic)
Sewing thread to match
Disappearing marker

* For interfacing, I used Pellon # 808 Craft Fuse (from Mrs P's)

Directions: Following manufacturer's instructions, fuse the interfacing to the back of the main fabric pieces.
Fold the 4" x 8" card slot strips in half wrong sides together and press. (For the large wallet, you have 6 strips and for the small wallet you have 4.)

With a disappearing marker, for the small wallet draw 3 parallel lines spared 1" apart on the long edge of your fabric. (For the large wallet, draw 5 parallel lines spaced 1" apart along one edge of your fabric.)
Place the raw edges of one of the folded 4" x 8" card slot pieces along the line closest to the bottom. (The folded edge will extend past the bottom of the main fabric.)  Pin in place; topstitch using a narrow, 1/8" seam allowance. (You will flip this fabric up to cover the seam once all the strips are sewn in place.)
Continue adding the folded card slot strips to each line in the same manner. You will have one strip left over. Flip each strip up over the stitching line, and press in place.

Place remaining strip raw edges even with the bottom of the main fabric and stitch.
With disappearing marker, measure in 4" from the edge and draw a line down the centre of your wallet.
From the bottom up, stitch along this line in a matching thread.
Place remaining interfaced main fabric piece right sides together with your wallet and pin around outside edges, leaving an opening to turn.  (I left the top edge open as it had less bulk.)  Stitch around your wallet using a 1/2" seam allowance. This will ensure your cards fit snugly in the slots. Turn your wallet right side out through the opening, and press. Test your slots with a card to make sure they are the right size.  If they are too snug, you will need to go back and take a narrower seam allowance.  If they are too large, sew again with a larger seam allowance. When you are happy with the fit, close the opening with machine or hand stitches.
Open your wallet and on the inside,stitch top to bottom over the previous line of stitching.  This will ensure a nice crease so your wallet folds neatly.On the outside, find the centre of your wallet and top stitch the elastic ring.  
Fold the wallet and loop the elastic around to snug it closed.
 All done!

Slip a Tim Card inside for a great gift!
This big red one won't be going anywhere, though...
It's filled up and in use already *-)  I love it, and as you can see...I needed it!
Have fun.  Send pictures! :)