For someone like me who's been quilting forever, it takes some deep thinking to come up with something I haven't yet tried. Last year, I figured out how to do an interlocking herringbone, a technique I now like very much. Thinking cap firmly in place, I started jotting down ideas.
About this time, my friend Nellie dropped in and casually mentioned how she was making an old-fashioned scrap quilt, and stitching it on her treadle. That sounded fun, and something I hadn't tried. Then I got to thinking...there are other machines in my house never used for quilting...like my beloved Juki serger. That would be interesting, so I added it to my list, which now read like this:
- Do a quilt -as -you-go
- Make a totally reversible quilt
- Make a quilt on the serger
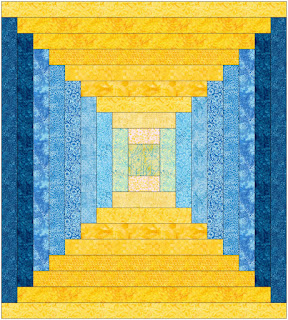
I had some pre-cut strips left from a previous project using the French Blue collection which would be great on one side, and chose colours for the other side from the Stashbuilder rolls. My plan was to alternate concentric rows of colour, with plain white batik.
So, if all goes as planned, one side will look like this:
...and the reverse side will be this:
I used my Accuquilt Go! cutter fitted with the 2-1/2" strip die to cut my pieces. It was done in jig time, and the WOF strips were perfectly even. I SO love this cutter!!
My quilt-as-you-go/reversible plan meant I would layer strips of fabric wrong sides together, with batting strips in between, and stitch them using a log cabin courthouse steps design. Then, in another lightbulb moment...it dawned on me that I could also cut my batting strips with the Accuquilt Go!
It worked perfectly for this.The batting I chose was Hobbs Poly-Down, which is a very stable, evenly needled, polyester. I started with a 4" centre (4-1/2" die) and cut 1 square of red batik, 1 square of yellow batik, plus one of batting.The fabrics were layered, and the edges lined up and pinned in place; notice my pins are not near the edge where they might knick the serger blade.
I was using the left needle only on my 4 thread serger (i.e. making it a 3 thread) and it's a perfect 1/4" seam if my fabric is hard against the blade.
Here's the first row of strips in place.
I continued building and trimming as I went.
In no time, this baby-sized quilt was cut, sewn, and quilted-as-I went.
The next challenge was to figure out how to photograph this, so Polly and I headed outside.
Polly perched herself on top of the pergola for a bird's eye view.
Here's the other side. Even though technically this is quilted, you can see how it looks a little "baggy". Clearly it needs more quilting.
Switching back to my regular sewing machine, I chose matching colours of 50 weight Aurifil thread and did an outline stitch 1/4" from each seam with the walking foot. On the back, where it was both blue and yellow strips, I used the pretty yellow in the bobbin.
Now it looks quilted!
The quilt ended up at 36" x 40", a good size for a baby quilt.
This was a fun and interesting project; thank you for a great challenge, Island Batik, Hobbs, Aurifil,and Accuquilt!


