Sew Karen-ly Created...

If you have arrived here via a link (such as to a tutorial) click on "Sew Karen-ly Created" to return to the latest blog post. I invite you to my website to see a gallery of quilts and patterns available for purchase.
Comments are always appreciated, simply click the word "comments" at the end of each post to leave your message. Thanks for stopping by!

Thursday, 26 April 2018

Sun Salutation

I have been posting"teaser" pictures for a couple of weeks on my Face Book page as I worked on my April challenge for Island Batik.  Now I am ready to show you the whole thing!
This month, the Island Batik Ambassadors were given the task of making something new inspired by a quilt design from the past. No surprise, I immediately thought of a New York Beauty! 
I have come to realize that most folks think of this as a "newish" pattern, but it isn't.  It's been around since the mid 1800's and known by a variety of names:  Crown of Thorns, Rising Sun, Rocky Mountain, and even Polk in the White House.  In the 1920's, the Stearns and Foster company started putting quilt patterns on the back of their Mountain Mist batting wrappers. I still have a few of those wrappers, inherited from my Grandmother...but unfortunately, not the NY Beauty one. Stearns and Foster renamed some of the traditional blocks, including this one which they dubbed "New York Beauty."  
There is an interesting short video here on New York Beauty's, showing quilts from the extensive collection of Bill Volckening.
I *love* New York Beauty quilts, and have made many of them over the years...so many, in fact, they turned into a book with AQS.   I began making the traditional square blocks, but it didn't take long for those blocks to morph into other shapes - mostly circles and ovals. There's just something about the combination of curves and spikes that is really appealing. 
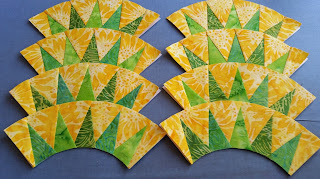
When my fabric arrived in February from Island Batik, I knew immediately that the collection called "Morning Sunshine" would be perfect for a New York Beauty design. Yellow sun, blue sky, green grass blades, sunflowers - it was all there!


I wanted the sunny yellows to be the focal point, so I drew the centre blocks into a sun, with partial coronas circling the points. The sunshine extended outward, dancing around blades of grass, and multicoloured flower petals, with sunflower centres. 
Here it is laid out for basting;  I used a Hobbs Poly-Down batting, which has a nice loft. 
The ditch-stitching was done with Aurifil monofilament, and the quilting with Aurifil 50 weight cotton, in colours 2120 Canary, 2520 Violet,4663 Baby Blue Eyes, and 2581 Dark Dusty Grape, on my Bernina 440.
I did curved cross-hatching in the centre, solar flares in the spikes, and swirls for the in-between spots. There is a small feather making its way around the outside sunflower bands. I left the coronas unquilted, as well as the blue sky surrounding the sun, because I like when there is a little pouf left in a quilt :)
The cream bands were quilted with circles (a few of which are actually round...!), and continuous curves outlined the spikes.
You can see the quilting better on the back.  I do like how those blue, unquilted arcs move your eye around the quilt.

I named the piece "Sun Salutation".
The Town of Amherst installed a sundial as part of a centennial project back in 1989 and I thought that would be a cool spot to photograph it...but it wasn't as easy to get both the sundial and the quilt in the same shot.
 (By the way...there was a difference of less than 10 minutes between that sundial and a watch!)
Here it is on the table.  It measures 28" x 42", and uses 16 different fabrics from the "Morning Sunshine" collection by Island Batik.
 The pattern is available for download at this link.
Thank you to Island Batik, Aurifil thread, and Hobbs Bonded Fibres for supplying the materials used in this project.  

Saturday, 7 April 2018

American Patchwork & Quilting Podcast

You truly never know what each day will bring.  Sometimes we have days full of frustration where nothing seems to go right.  Other days are golden: all your seams match and you have the correct shade of quilting thread.  And then there are days where you open your email and Pat Sloan is inviting you to be a guest on her quilting podcast.  Wait - what?!   Yup! :)
That will be ME on Monday, April 9. It will be a phone interview (so I don't have to fuss with my hair!!) at 4 pm Eastern time...which is 5 pm our time (and 5:30 in Newfoundland).

You can listen here, and I hope you will.
So...any questions for Pat? I know she's a big favourite of most quilters!

Tuesday, 3 April 2018

2018 Nova Scotia Fibre Arts Festival

Although the list of workshops is not as yet posted on the festival site, I have started taking registration for the two classes I will be teaching this year at the Nova Scotia Fibre Arts Festival.  Both involve free motion quilting. 
On Thursday, October 11, 2018,  I will be offering my very popular beginner class.  Entitled, "Free Motion Quilting for the Absolutely Terrified", the class is about confidence building. We start at the beginning with how to adjust thread tension (both top and bottom), learn about needle selection, thread delivery, marking, and lots more.  


 It's all about getting comfortable with your domestic machine, and with the process.


Our project for the day is a very simple whole cloth, which features following a marked line, echoing, and background fillers. 
-------------------------------------------------------------------
The second class I am offering is "Beginner Feathers".  Note that this is a beginner feather class, NOT a beginner free motion class.  This workshop will be held on Friday, October 12, 2018, from 9 am to 3 pm.  It will cover instruction for 3 different approaches to creating free motion feathers:  easy, bump, and hook. 


  Once you've decided on your favourite feather stitching method, we'll do all-over feathers, for a fabulous background fill. 
The class project will be a small whole-cloth, featuring a wreath and some feathery swirls.
You can find more information on both classes here,as well as a link for online registration.  These classes are limited in size.  If you have questions, email me here. 

Monday, 2 April 2018

April Fool!

I have been waiting and waiting to post this quilt on April Fool's Day...then I realized that this year, it fell on Easter Sunday. So, this April Fool is a double one - a trompe l'oeil , posted on the wrong day!

*I would like to encourage you to read to the bottom of this post before Googling and clicking links you find online.*

I did NOT design this quilt;  I saw it online a good many years ago, and it has been on my bucket list all those years.  It's a fabulous design, the brainchild of Ukrainian quilter Mezhibovskaya Valery Vadimovna, who blogs under the name lerusisik. You will notice I did not add any live links to her site as I normally would do. There's a reason...
Lerusisik designed this quilt as part of a guild challenge on twisted log cabin blocks.  They had 6 months to complete the challenge, and she came up with this brilliant design which she called "Through The Lens."  Amazingly, it did not win the challenge. (? must have been some pretty strong competition in that guild!) She next entered it in a math contest (didn't win that either) and then decided to submit a picture of her quilt to a German magazine, Lena's Patchwork, who developed a pattern, and featured it on the cover.

As happens, people began making the quilt and submitting it to shows and winning prizes, with no credit given to Lerusisik. They claimed the design as their own.I know how hurtful that is, and Lerusisik became quite upset about the whole thing. Earlier this year when I began my version of her quilt, I tried to revisit her website, with not very good results.  My McAffee program refused to let me on the site, saying there was malicious code.  I tried from a different computer, and Windows Defender gave the message, "Whoa - are you sure you want to go there? "  Clicking a link from a saved sketch in Word gave the message, "this site contains viruses, click at your own risk."  Hmm...I got brave (or stupid) and clicked it anyway.  I got to the main page ok, and everything seemed fine, so I decided to try a link to Barbie doll clothes (that sounded innocent enough, right?)  I ended up on a porn site.  So...draw your own conclusions, but for these reasons I am not posting any live links to her site, and if you Google and click, do so at your own risk. I am not going back.

Despite all of this, I still wanted to make the quilt!  Originally, she had shared her working sketch, done in Corel Draw, on her site for readers to download (with permission), and I had saved that sketch.  That's what I used to work from:
In hindsight, I should have taken the time to draw this out in EQ8.  It may not be obvious, but if you study the sketch, you will see that some of the blocks cannot be pieced as drawn.  There were many last minute adjustments in strip sequence as I went.
As you see in the magazine cover above, the original had multi-coloured centres but I chose to go with just 3 colours for the quilt:  black, white, and Canada Red Kona cotton.  I think the high contrast in colours helps add to the 3-D effect, and I like how clean and crisp the colours look together.
There are only 4 square blocks in the entire piece (the corners), and these measure 4".
The strips range from 1/2" to 1/8" wide, many of them curved. It was a nightmare to piece.
 I wasn't sure where all these pieces would fit in the final puzzle!

 I've done a fair bit of patchwork in my day, but this was truly difficult.  About 6 blocks in, I decided I couldn't do it. I set it aside for a couple of weeks while I thought on it.  It occurred to me that the piece is symmetrical side to side and top to bottom, so once I had the first quadrant of 9 blocks figured out, that would be the worst of it, as the shapes would repeat after that. I think I can, I think I can...
 Amazingly, as the blocks grew, the centre popped up right away.
These are the sewn blocks before joining...which took another week or so to ponder.  Since the blocks were all different sizes...how could I possibly join them in rows?  It couldn't be done.
I thought back to the Global Warming quilt I did last year, and a light bulb came on! I needed to join the centre blocks in a circle, and then insert them into the outside blocks, like sewing a sleeve in an armhole.
 There was a small fly in the ointment, as perhaps you can see below:
 No?  Look here; there are gaps in the corners, where square meets round.

 I cut 2 triangles of black and 2 of white and hoped it would work.
 It did! :)
 About this time, Polly came along to shatter the illusion!
The quilt is by no means perfectly made.  There are strips that don't match up at the joining of the sphere to the background, but I did my best, and the illusion still works.  Interestingly, I recall reading on Lerusisik's site that she also had issues figuring out how to join her blocks and finally sewed them together by hand, using an EPP method.  I added a very simple border of black and white blocks and strips, which help add to the movement of the whole piece.  It is quilted very simply using Aurifil white, black and red thread.  All of the stitching is done in the ditch, so as not to detract from the fabric.

This is far and away the most challenging patchwork project I've done.  I cannot say I enjoyed making it, but I sure as heck enjoyed finishing it!  If you would like to try your hand at this...I wish you the best of luck. Thank you, Mezhibovskaya Valery Vadimovna, for your very brilliant design.
Beth of Mrs. Pugsley's Emporium has kindly invited me to display the quilt at her shop later this spring.  I'll keep you posted on when that will be (I think we need to decide first who is climbing the ladder to hang it...).